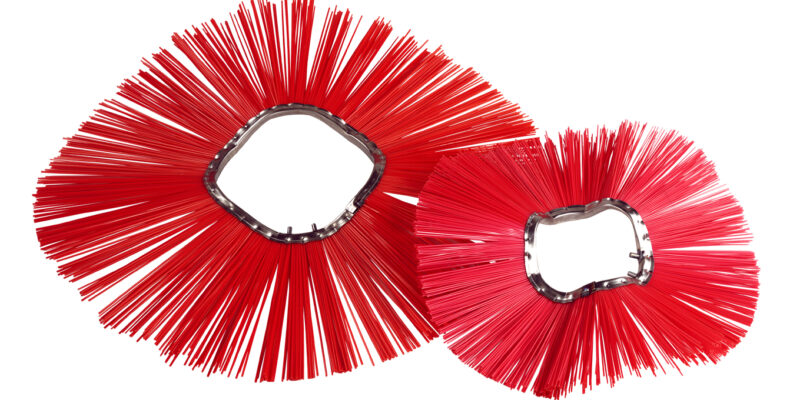
Convoluted wafers have a wavy, convoluted design. The inside ring of the wafer gets pressed to make the convoluted shape. There are no spacers needed with convoluted wafer. There is, however, a specific way they need to be installed. Once you get the placement right, convoluted wafers are much easier to install as there is no need for a spacer.
Two Type of Wafer Racks
There are two types of wafer racks: a 3-bar wafer rack and a 4-bar wafer rack. A convoluted wafer has two pins on the inside of the ring. The two pins straddle the bars on the wafer rack and keep the wafer in place.
Because the convoluted wafer has high and low points around the center ring, they must be installed on the wafer rack properly to get the desired spacing.
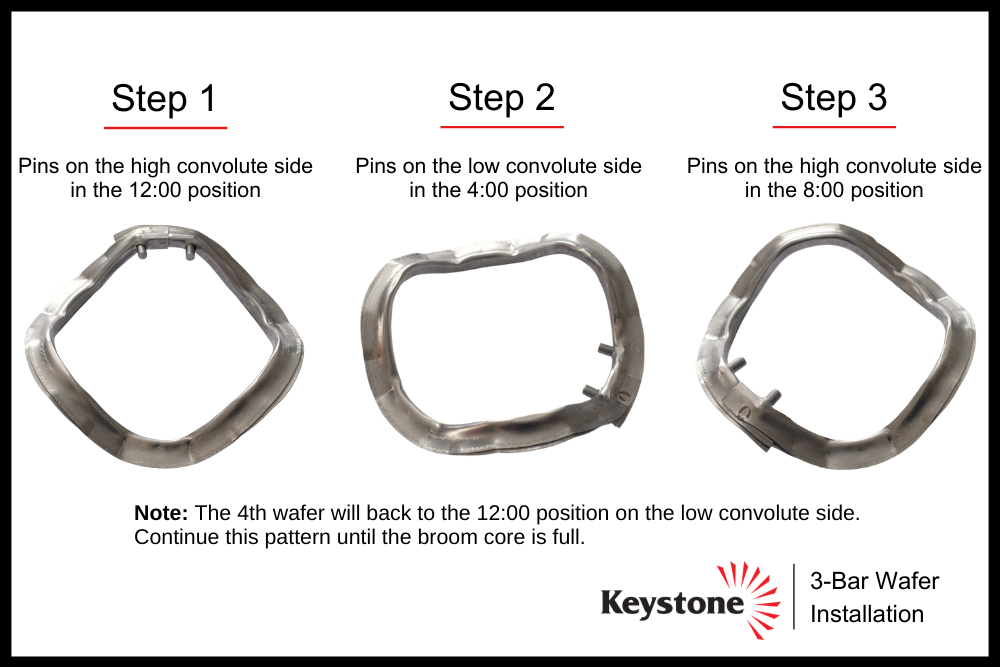
3-Bar Wafer Rack Installation
The 3-bar wafer rack is designed to build broom cores with smaller ID’s. Typically, you’ll see the 6 3/8″ or 8″ ID wafers families use the 3-bar wafer rack.
- Step 1 – Place the first wafer section on rack with the pins on the high convolute over the first bar. The pins will be in the 12:00 position.
- Step 2 – The second wafer section gets flipped upside down, so the pins are on the lower convolute. Rotate the wafer 120 degrees from the first wafer pin to the next bar of the wafer rack. The pins will be in the 4:00 position.
- Step 3 – The third wafer section get flipped back to where the pins are on the high convolute. Rotate the wafer 120 degrees from the second section to the third bar of the wafer rack. The pins will be in the 8:00 position.
- Repeat this process until the core is full of wafers.
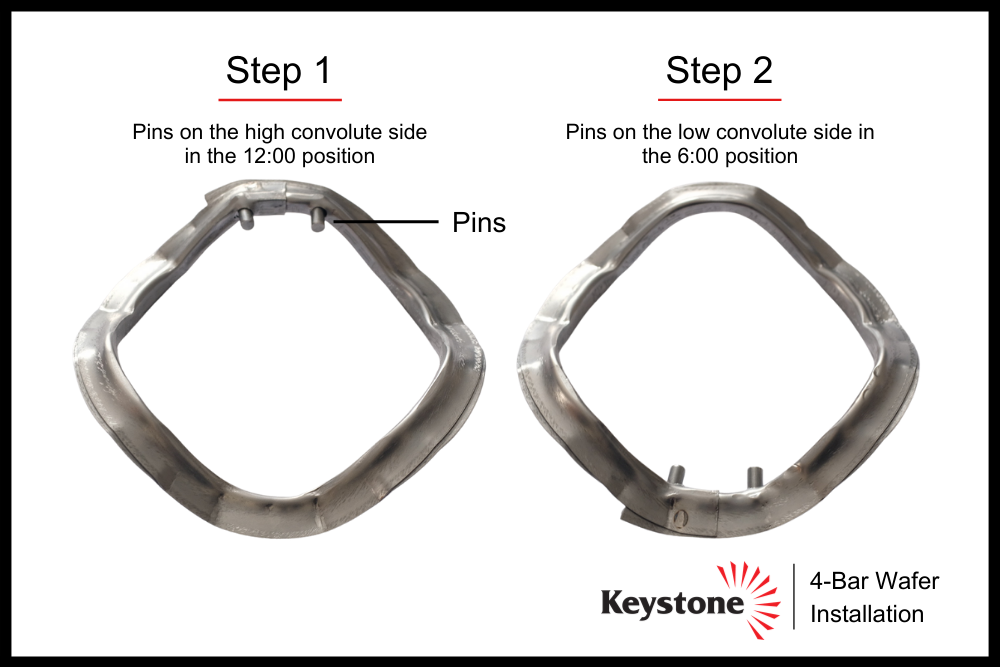
4-Bar Wafer Core Installation
The 4-bar wafer rack is designed to build broom cores with the larger 10” ID’s. These are you’re your 10” x 27”, 10” x 32”, 10: x 36” wafer families.
- Step 1 – Place the first wafer section on rack with the pins on the high convolute over the first bar. The pins will be in the 12:00 position.
- Step 2 – The second wafer section gets flipped upside down, so the pins are on the lower convolute. Rotate the wafer 180 degrees from the first sections pin to the opposite bar. The pins will be in the 6:00 position.
- Step 3 – The next wafer section will have the pins on the high convolute and will get rotated 180 degrees and align with the first wafer. The pins will be back in the 12:00 position.
- Repeat this process until the core is full of wafers.
If you have any additional question, feel free to contact one of our customer service reps at 800.635.5238.
Happy sweeping!